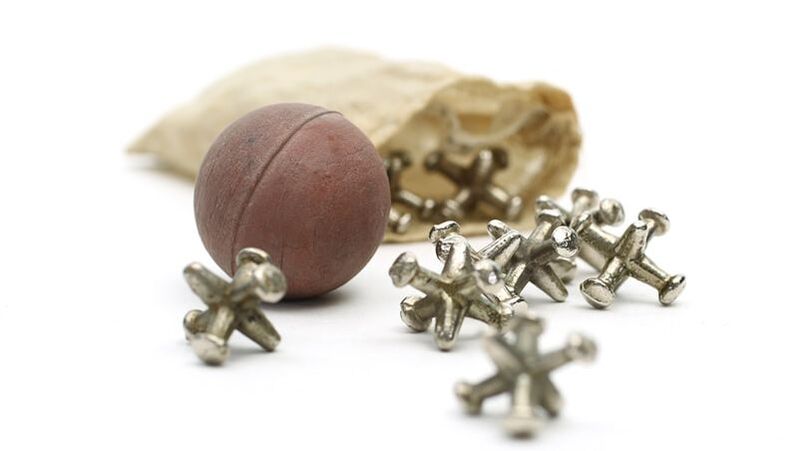
Toys
Toys may have been in short supply and expensive, however many children cherished the handcrafted toys they had. Parents, grandparents and others would use their artistic and engineering skills to create heirloom toys. Now you can get in on the fun and make your own toys.
Buzzsaw
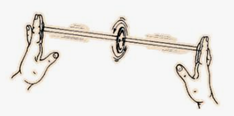
All you need to make this is a button with two holes and a piece of string to make a toy that will entertain you for hours.
Thread the string (thin embroidery thread works great) through the holes of the button. When you have an equal amount of thread on both sides of the button tie the ends in a knot. To play hold the ends of the thread in each hand. Next twist and twist and twist the thread. As the button spins and the thread untwist move your hands back and forth to see how long you can keep the button spinning.
Thread the string (thin embroidery thread works great) through the holes of the button. When you have an equal amount of thread on both sides of the button tie the ends in a knot. To play hold the ends of the thread in each hand. Next twist and twist and twist the thread. As the button spins and the thread untwist move your hands back and forth to see how long you can keep the button spinning.
Wagon Dolls
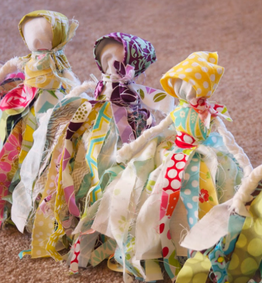
Beautiful Wagon dolls were made using fabric scraps. They could be made using just one fabric pattern or scraps from several different fabrics.
Supplies-
Supplies-
- Approximately 35 strips of fabric, 1-2 inches wide and 18 inches long (this makes the dolls body, add more or less strips for a bulkier or skinner doll.
- 20 strips of fabric 1-2 inches wide and 8 inches long (for the dolls arms)
- Yarn or fabric 1/2 inch wide to tie pieces together
- Cotton balls or a ball made by rolling a strip of fabric (this is the doll's head)
- Gather the 35 strips of 18 inch fabric, making sure the ends meet up. Fold the bundle in half. Place cotton balls or the ball of fabric in the fold. Tie a piece of yarn around the fabric bundle about 1-1 1/2 inches from the fold. At the base of the fabric ball. This will create the head of the doll. Spread the fabric strips out around the ball to cover the cotton or fabric ball.
- Gather the 20 strips of eight inch fabric. You can braid or twist these strips or leave loose. Tie a piece of yarn around each end of the strip bundle. This creates the arms. Separate the strips forming the dolls body into two bundles and stuff the strips for the arm between these strips. Make sure the arms are just below the tie for the dolls head. Tie another piece of yarn around the strips forming the body just below the spot where the arms were inserted.
- This creates a doll with a nice full dress. If you prefer your doll to have legs, separate the strips below the arms into two bundles. Tie a piece of yarn around the base bottom edge of each bundle to form legs.
- Embellish the doll by making clothing out of fabric scraps. A dress, apron and hat or breeches and a shirt. Add hair made of yarn, if desired.
Jacobs Ladder
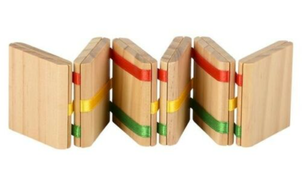
The Jacob's ladder toy is usually made of wooden blocks and ribbons. When the toy is held at the top an optical illusion appears as the toy blocks cascade down the ribbons. Sometimes long images were cut into squares and added to the blocks. As the top block is held one image cascades down, move on to the next block and a new image cascades down.
Supplies:
12 pieces of rectangle cardboard ( 2 1/2 x 3 inches)
3 pieces of ribbon approximately 42 inches long. (double sided ribbon works best. You can even use gift wrap curly ribbon)
Glue and Scissors
Directions:
Supplies:
12 pieces of rectangle cardboard ( 2 1/2 x 3 inches)
3 pieces of ribbon approximately 42 inches long. (double sided ribbon works best. You can even use gift wrap curly ribbon)
Glue and Scissors
Directions:
- Place one rectangle one the table with the the longer ends at the top and bottom of the table. Glue the ends of the ribbon onto one piece of cardboard by centering the end of one piece of ribbon coming off one of the short sides and place the other two pieces about 1/4in from the edges coming off the opposite short side.
- Glue another piece of cardboard directly on top of the first piece by matching up the edges and making a little sandwich.
- Flip the ends of the ribbons over the top of the sandwich. Using two more pieces of cardboard create a new sandwich. Repeat this process until you have used all of the cardboard. Trim the excess ribbon from the last sandwich. When finished you should have 6 sandwiches connected by alternating ribbon sets.
- To play hold the top of one of the sandwiches. Let the other sandwiches cascade down.
|
|
|
Climbing Bear
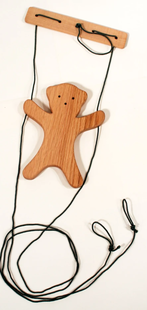
Many toys of this time had duel purposes. They entertained children but also taught children skills that would be used on the farm. The climbing bear toy was typically made from wood and string. It works by pulling on the alternate sides to move the bear up the ropes. This motion also taught children the technique of milking a cow. This simple toy can also be made from heavy cardboard and string.
Supplies:
Heavy cardstock or cardboard Tape or glue
Drinking straw Weights ( one or two coins will work)
String (preferably not yarn) Craft stick or dowel rod (about 6 inches long)
Directions:
Supplies:
Heavy cardstock or cardboard Tape or glue
Drinking straw Weights ( one or two coins will work)
String (preferably not yarn) Craft stick or dowel rod (about 6 inches long)
Directions:
- Draw the outside shape of the bear (you can use a gingerbread man cookie cutter to help draw the shape) onto heavy cardstock or cardboard. Decorate your bear. Cut the pattern out of the cardboard.
- Cut the drinking straw the length across each arm (were the wrist would be on the bear). Tape or glue the straw in place over the bear's wrists. You may want to place tape over the straws and onto the back side of the bear's arms as well as putting tape across the wrists like a bracelet. Wear and tear will pull the straws off so secure them as best you can.
- Tape or glue the weight (coin) onto the bear's belly.
- Cut two pieces of string about 3 feet long and one piece about 1 foot long.
- Using the shorter string tie it around the middle of the craft stick or dowel rod and make a loop at the top to hang the toy from a hook.
- Thread one of the longer strings through each of the drinking straws attached to the bear. Tie a know in the bottom end of each string. Tie the top of the strings to each end of the craft stick or dowel rod. You might want to also tape this top string in place.
- To make the bear rise, hold the end of the strings in each of your hands. Alternately pull the ends of the strings making the bear rise. When the bear gets to the top, let go of the string and let the bear drop back down.
